
How To Iron Shirts
You have arrived.
Interview in 5 minutes.
One final check of the bathroom:
Suit – nice!
Tie – nice!
Hair – looks great!
Wait…
Your shirt has a lot of wrinkles (like it's never been washed or cleaned)!
Your confidence, your credibility will be gone...and you will stand out for the wrong reasons.
Don't let this happen to you.
Wrinkled clothes = lack of attention to detail
If you fail at small tasks...how can you be trusted with big tasks?
So that means knowing how to iron shirts (you can't always leave them dry-cleaned).
Isn’t it hard and boring?
No, please see the article and video below for the steps to iron your shirt properly.
The benefits of ironing your shirt correctly
If you are really serious about dressing well, you must learn how to iron your own shirts.
Ironing does to your clothes what a protein shake does to your body after hitting the gym. It targets the fibers in wrinkled fabrics and straightens them by loosening chemical bonds.
The process requires the heat of the iron and the weight of the soleplate (underside). Soon after, the shirt returned to its original shape.
While some say this can also be achieved with steam (which requires less effort), the truth is, nothing beats the crisp ironing results that only a hot iron can provide.
If buying a nice, wrinkle-free shirt doesn't convince you that ironing is important - here's the bigger picture:
Your shirts will last longer. By ironing your shirt instead of dry cleaning it, you can focus the washing/cleaning portion on the areas that need it most (cuffs and collar), while gentle washing the other parts (sleeves and body). This adjustment may extend the life of your shirt.
.
You'll get significant savings. Even if you pay the low cost of $1 per shirt for dry cleaning, you can expect to spend $240 per year (since 1 shirt x 20 working days = 20 shirts cleaned per month). But you won't get anywhere near that amount if you iron it yourself.
.
You control the outcome. Whenever you need a crisp dress shirt immediately (from the laundry pile), you can achieve this without the unpredictable service of a cleaner.
Ironing your shirt: everything you need
Everything you need to iron your shirt properly:
1. Clean Iron
The base plate must be free of rust or deposits. If you're not sure about this, try using an iron on an old white cloth to see if it leaves any stains.
If there is sediment buildup, remove it using the steamer function using a solution of distilled water and 50% vinegar.
2. Freshly Washed Shirt
Self-explanatory. If your clean shirt has been dried, remember to take it out after the buzzer goes off to reduce wrinkle formation.
Also note the type of fabric your shirt is made of (refer to the care label usually located inside the collar). The label should also have an iron symbol. It first states whether the shirt can be ironed (based on points).
One thing - this is a synthetic shirt. The heat should be on a low setting (175-230 degrees).
Two points – this is a silk or wool shirt. It requires a medium setting (250-300 degrees).
Three dots – this is a linen or cotton shirt. It takes 320-400 degrees to restore to its original state. These materials are also the only ones that should receive steam (unless you see the X by the steam symbol). Therefore, you will need some distilled water in these cases.
NOTE: If your shirt has removable collar stays, don’t forget to take them out before you start ironing.
3. Clean Standard Ironing Board
Technically, it's optional - but an ironing board does make the whole thing a lot easier than a desk or table (which has to be covered with a towel). You don’t need the professional kind. Those large plain boards from department stores will do just fine.
4. Distilled Water
Water is used to return the fabric to a stressed, wrinkle-free state and reduces the risk of the hot iron burning the fabric.
Ironing The Shirt: Step #1 – Back Of The Collar
Start at the edge of the back of the collar - iron towards the middle. It is important to go in this direction. Starting in the middle may result in noticeable creases in the fabric near the neckline.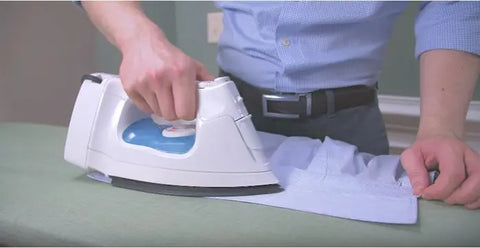
Ironing The Shirt: Step #2 – Cuffs
First, iron the inside of the cuffs to remove the main creases - again, moving from the edges towards the middle. Iron the outer area using the same method and you're done. Iron gently around the buttons to avoid damaging them.
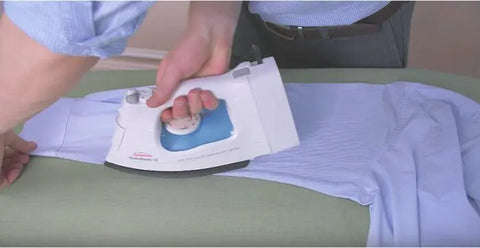
Ironing The Shirt: Step #3 – Sleeves
Smooth the sleeves with your hands before placing the iron on them. This helps prevent unnecessary creases. Start at the tip of the iron at the cuff and work your way back to the shoulder. Turn the sleeve over and check the other side to see if it needs a quick patch.
Ironing The Shirt: Step #4 – Back
When ironing the back, you must be extra careful if the shirt has wrinkles. Therefore, I recommend that you start underneath the pleats first and then iron on top. Then continue ironing the rest of the back (you'll need to reposition the shirt several times on a flat surface to iron all edges and corners).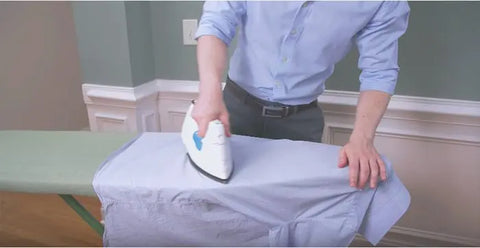
Ironing Your Shirt: Step #5 – Shoulders
It's time to work on your shoulders (also called the yoke). Position the shirt so that the narrow end of the ironing board is inside one of the sleeves. Iron the yoke, moving from the outer edge toward the middle. Then flip the shirt over and place the other sleeve on that end of the board. Repeat the same steps.
Ironing The Shirt: Step #6 – Front And Placket
The next stage covers the front. Be gentle when ironing buttons to avoid damaging them or loosening the threads. Your goal is to keep the fly nice and crisp, as it is one of the most important parts of your shirt. For shirt pockets, start from the outside and work inward to prevent creases.
Ironing The Shirt: Step #7 – Front Of Collar
Finally iron the front of the collar. Apply the same method you used in step #1 - start at the edges and work your way toward the middle.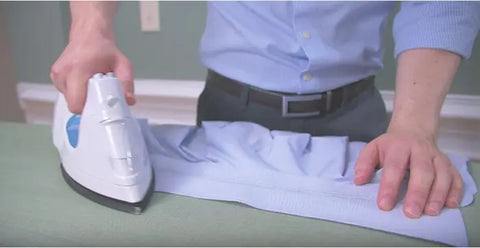
Ironing a Shirt: Pro Tips
1. Forget the dryer—iron your shirts while they’re still wet. Remove them from the washing machine immediately after washing. This will keep your shirts fresh (while avoiding possible wear and tear from the dryer).
2. Iron shirts in batches. The setup process takes almost as much time as ironing a shirt. Therefore, you can save time by ironing all your shirts at once rather than ironing each shirt several days apart.
3. Check for stains before ironing. Ironing a dirty shirt may cause stains or discoloration to be permanently deposited on the fabric. When you use a hot iron, there shouldn't be even a drop of coffee or a ring around your collar.
4. For “stubborn” wrinkles – moisturize the affected area with a spray of water. Then continue ironing out the creases.
5. Place aluminum foil under the ironing board cover. This will help speed up ironing time.
6. For dark fabrics – always iron with the inside out. This is to prevent the fabric sheen (or shiny iron marks) from standing out.
7. Not sure whether to iron your clothes? Please use a steamer instead. It is less likely to damage your clothes. Also consider using a pressing cloth (a thin cotton handkerchief that prevents direct contact between the iron and the fabric).
8. Starch can be used in small amounts. The starch will keep your shirt crisp for a short period of time - useful if you're looking to dress up in the morning. But starch may also break down cotton fibers faster (which can damage your iron over time). So just put a little starch on the collar and cuffs.
9. Learn how to care for your iron. It is necessary to clean the iron from time to time to maintain its functionality. You can ask for an iron cleaning kit at your local hardware store. Or try wiping the iron with a damp cloth (when it hasn't been used recently) to remove any residue. Then wipe the baseboard with a beeswax candle and wipe off the excess with a rag.
That's it! You just learned how to iron a shirt effectively, safely, and quickly. I recommend that you print this out and tape it somewhere near your ironing station.
At this point, you've got the knowledge and skills to dress up whatever you need, so you can leave the house in a great shirt anytime you want!


